Monday, January 12, 2009

More Folded Flower Pinwheel Blocks


Here are some more of the folded flower pinwheel blocks - see the tutorial in my last post. I was able to make these before we had a thunderstorm and I had to turn off the sewing machine in case of power surges. They are not in any particular order at the moment. I won't try to sort them into order until I have made all the blocks for the quilt. I am going with the flow at the moment and will see how many blocks I finish up with. I think I may need to hunt the scrap bins for a bit more fabric to suit the quilt. I really want to avoid buying any more fabric - just use my stash and scraps.
I may have to succumb for borders and/or backing but I refuse to buy anything else. This year my aim is to use my stash and avoid buying unless absolutely necessary. Unfortunately I found I don't have much in the way of soft or pastel fabrics so that is one area I may need to consider supplementing.
My other aim for the year is to reduce the number of UFOs in my house - I am going to aim at at least one a month. Even at one a month I will not have my works in progress or unfinished objects all finished this year! And here I am doing something new - how does that work??? I will show you how I get on with this one and today I have been working on a crochet blanket which I hope to finish this month. I will post a photo soon.

Sunday, January 11, 2009

Folded Flower Pinwheel Block Tutorial

  This is the pinwheel block I have been making.
Click on the photo to enlarge so you can see the detail.


I have spent time last night and today making a tutorial for the construction of this block.
First I spent some time choosing fabrics. I wanted roughly pastels with a small difference between the folded part or "flower" of the block
 and the flat part or background. I started with the fabric I want to use for the sashing. 
In the first picture I am 
trimming the rough edge and in the other you can see that the ruler is set to 2-1/2 inches to cut the sashing strips.

In the next photo you will see that I have picked out colours from the sashing material to use for the pinwheels. I forgot to photograph the 3-1/2" strips after I cut them and before . I made my squares 3-1/2 inches to give a 6" finished block once the 4 segments are stitched together.
The next
 thing was to start assembling.
 All the basic components go together like this.

The next photo has unfortunately gone in sideways for some reason. It shows how the folds meet together on the inside - this is NOT how I put them together but just to show you how to get it all to go together as accurately as possible.
Bottom left shows the petal triangle in position and the one on the right shows the petal folded up to the edge. Top left shows the bottom triangle already folded and the top one positioned to but right up against the fold of the bottom one. The right of the photo shows it all in position with just the top layer folded back to show how it all butts together. By keeping the folds together it will match up later.

The photo below shows  how to position the 2 segments to put them together and then on the right they have been positioned edge to edge. Fold the bottom segment up on top of the other one and , making sure the folds are butted up to each other, stitch together.
After stitching 2 units together trim away the excess fabric at the corner, folding back the top and bottom layers and clipping only the pinwheel fabric as shown.


You need 2 of these sets to make a full block. Again make sure that the folds butt together.


I hope this all makes sense. Please tell me if it doesn't and I will try to simplify it!
This is my first tutorial so I am very open to constructive criticism :)

On another topic, a very generous blogger is having a giveaway for her 100th post. Go and make a comment for a chance in the draw:

http://bozzysblog.blogspot.com

Tuesday, January 6, 2009

Pelicans

We had a quick trip to Gosford early in December, staying with Ann's son and his partner and went on up to see Ann's parents (my aunt and uncle) for a couple of hours in Shoal Bay. 
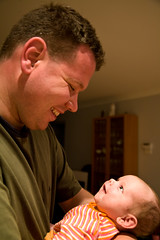
I stupidly forgot to take people photos except for my dh Max. I did get some lovely photos though.

Max had to do some business in the morning so we left after that and drove on up, about an hour and a half. We arrived right on lunch time so we decided to stop in for lunch before landing in on my aunt and uncle. 

I have previously had prawns from the wharf in Nelson Bay so we went down there and ate at a fish cafe on the wharf itself. Here are some photos. The first is Max waiting for our lunch to arrive at the table, then some of the pelicans and cormorant after prawn heads and tails - 

you can see them in the air in the top right hand corner of the second photo. Notice the do not feed the seagulls sign in the photo with Max - well they weren't feeding the seagulls, they were feeding the pelicans and a stray cormorant which flew in to join them!

One also just of the bay from the wharf.
 It was a glorious day and the water was so clear you can see the rocks under the water in a couple of the pelican photos.

Tuesday, November 25, 2008

Exhibition week


Last week was insane. Whatever made me do my father's quilt, dubbed "Persian Tiles", in 2 weeks?? I had very little sleep and my neck is still recovering but I did manage to get it finished. I have to say though that I would not have finished in time for the exhibition without help on Friday from Elizabeth and Trudi from my Friday Friends group. Thankyou girls. It was well received at the exhibition and apparently several people wanted to buy Persian Tiles. I am told one lady was very upset that it really was not for sale but already had a home to go to. The first photo shows me presenting the quilt with my son in the foreground. 
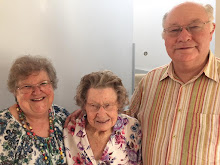
In the second photo I am sitting next to my father catching down the hanging sleeve on the back. I didn't have time to hand stitch it for the exhibition so the bottom of the sleeve was pinned on and I stitched it after I had presented the quilt. You can see the red paisley backing in the second photo. It is difficult to photograph the quilt to show off the fact that all the fabrics except the backing are overprinted in gold. You can see some of the sheen on the border in the second photo but the sheen fades out the red and green striped print. I will try to get some better photos in the next few days.

I also finished "Stasia's Jungle" for the exhibition. It is the attic windows quilt in my last entry. I am thankful for having posted the photo here last week because I discovered an error in the piecing of the main border. Were you able to pick it? Compare the last photo with this one. Fortunately it did not take to long to fix. It would have bugged me forever if I had not changed it. I free motion quilted the main border to give the feeling of a jungle - leaves, puddles, trails... - picking up on the parrots in the windows. It was fun doodling. No-one else may see what I was trying to do but I enjoyed doing it. I will be giving this quilt to my surrogate granddaughter Stasia for Christmas. I will have to add a photo later - I haven't taken a photo of the finished quilt yet.

Tuesday, November 18, 2008

Quilts under construction


These are the quilts I am working on for the Bungendore quilt exhibition this coming weekend.

The first one is an H quilt for my father. He will be 91 on Sunday. I still have to add the borders which I cut out this morning. The fabrics are
 almost all William Morris style or paisley. I have been doing it in a big rush and using it as therapy to keep my mind off losing my darling Ann. All the fabrics are top printed in gold so it has a sheen to it. Very rich looking. I love the fabrics very much and am quite pleased with the way it is turning out. All the top fabrics are from my stash, with the addition of a few from my sister's stash. I actually made several more blocks but didn't like them in the quilt so I will make a lap quilt for my sister with the left over blocks - after the exhibition. I have managed to find a red paisley print for the backing - no gold!

The second quilt I am going to give to our surrogate granddaughter Stasia for Christmas. The "window panes" are folded and the fabric is brightly coloured parrots. I added the yellow spot border yesterday. I finished the top other than the final border early in the year after starting it in a workshop. The fabrics in this quilt have also all come from my stash. The technique was fun and created little pockets. Unfortunately the pockets are upside down to the parrots - a little lesson to remember for positioning a directional print another time. Ooops thank goodness for this photo. I just realised I made a mistake - just in time to fix it thank goodness. Do you see it?

The third one I made last year for my friend Raeline's 40th birthday. Unfortunately she had the bad manners to upgrade to a king size bed a couple of days before her birthday LOL. I am now adding more side panels to make it big enough for them to sleep under. I think this is the only quilt I have made from a pattern other than those I have started in workshops! Even then I have deviated with the borders.

I will post more photos when I have finished the quilts, including some closeups.


My cousin Ann


I have not been posting because my darling cousin Ann died recently. I am devastated. We have always been very close and shared many common interests. This is the last photo I took of Ann on 23rd June 2008 while she was having dialysis. That visit to Gosford was the last time I saw her. 

One of my first memories is of Ann, her friend Libby and myself playing "ring a ring of roses". I couldn't have been more than 6 at the time, Ann 15 months younger. We always got on exceptionally well and neither of us could remember having argued or falling out with each other. Ann has always been one of my best friends and we shared many wonderful and heartbreaking moments together. We shared ill health as children and the joy of our children as adults. Before her husband left her we shared 2 holidays lasting a month each, the 2 couples sharing accommodation and expenses. The first one was in Tasmania and the second in the goldfields and the Great Ocean Road in Victoria. Our last holiday away together Ann, Max and I spent a wonderful week on Norfolk Island. We had a wonderful time together. Ann and I were plotting how the 3 of us could manage a holiday in New Zealand and we also wanted to revisit Tasmania. We had also hoped to have a holiday in Queensland some time.

Travelling was always interesting with Ann. She had many, many things wrong with her but was almost unfailingly cheerful. We would take a wheelchair with us after the Tasmanian trip as her body deteriorated. We always knew where every toilet in cooee could be found. We made lots of pit stops to cater to Ann's fluid tablets LOL.

When, on the very few occasions that things got her down and she would have a little weep with me, she always worried about me and apologised for upsetting me. Whingeing just was not in her. Earlier this year her heart specialist told her that he didn't think he would have had the stamina to live as she did. I don't think I would either. Ann was a loving, giving, caring, patient creative lady whom I admired greatly.

I will continue to add photos and memories of Ann as I feel able and have time.

Sunday, October 19, 2008

Tegan, Tim and Anastasia


Tegan and Anastasia
Originally uploaded by Mister Tim
These are my beautiful first daughter Tegan, her husband Tim and my gorgeous first grandchild. I am so proud of them and more than a little besotted. This photo was taken on 9th October 2008. Anastasia is about 7 weeks here and as you can see is smiling. It is so exciting to see each new step in a baby's development and to watch them grow and develop their own distinctive personality. When Anastasia was born she was the image of  Tegan and her siblings as babies. For me it was a case of deja vu. Several relatives and friends who knew my children as babies have commented how like she is. Anastasia does have her father's mouth and ears though :) I am very grateful to you both Tegan and Tim for producing this gorgeous grandchild for me and sometimes allowing me to cuddle her! Clever Tim for taking such a beautiful photograph too. Thankyou.